Quick Start Guide
Welcome to our blogging platform! This quick start guide will walk you through the essential steps to set up your account, create posts and recipes, manage comments, and build pages using blocks. Let's get started!
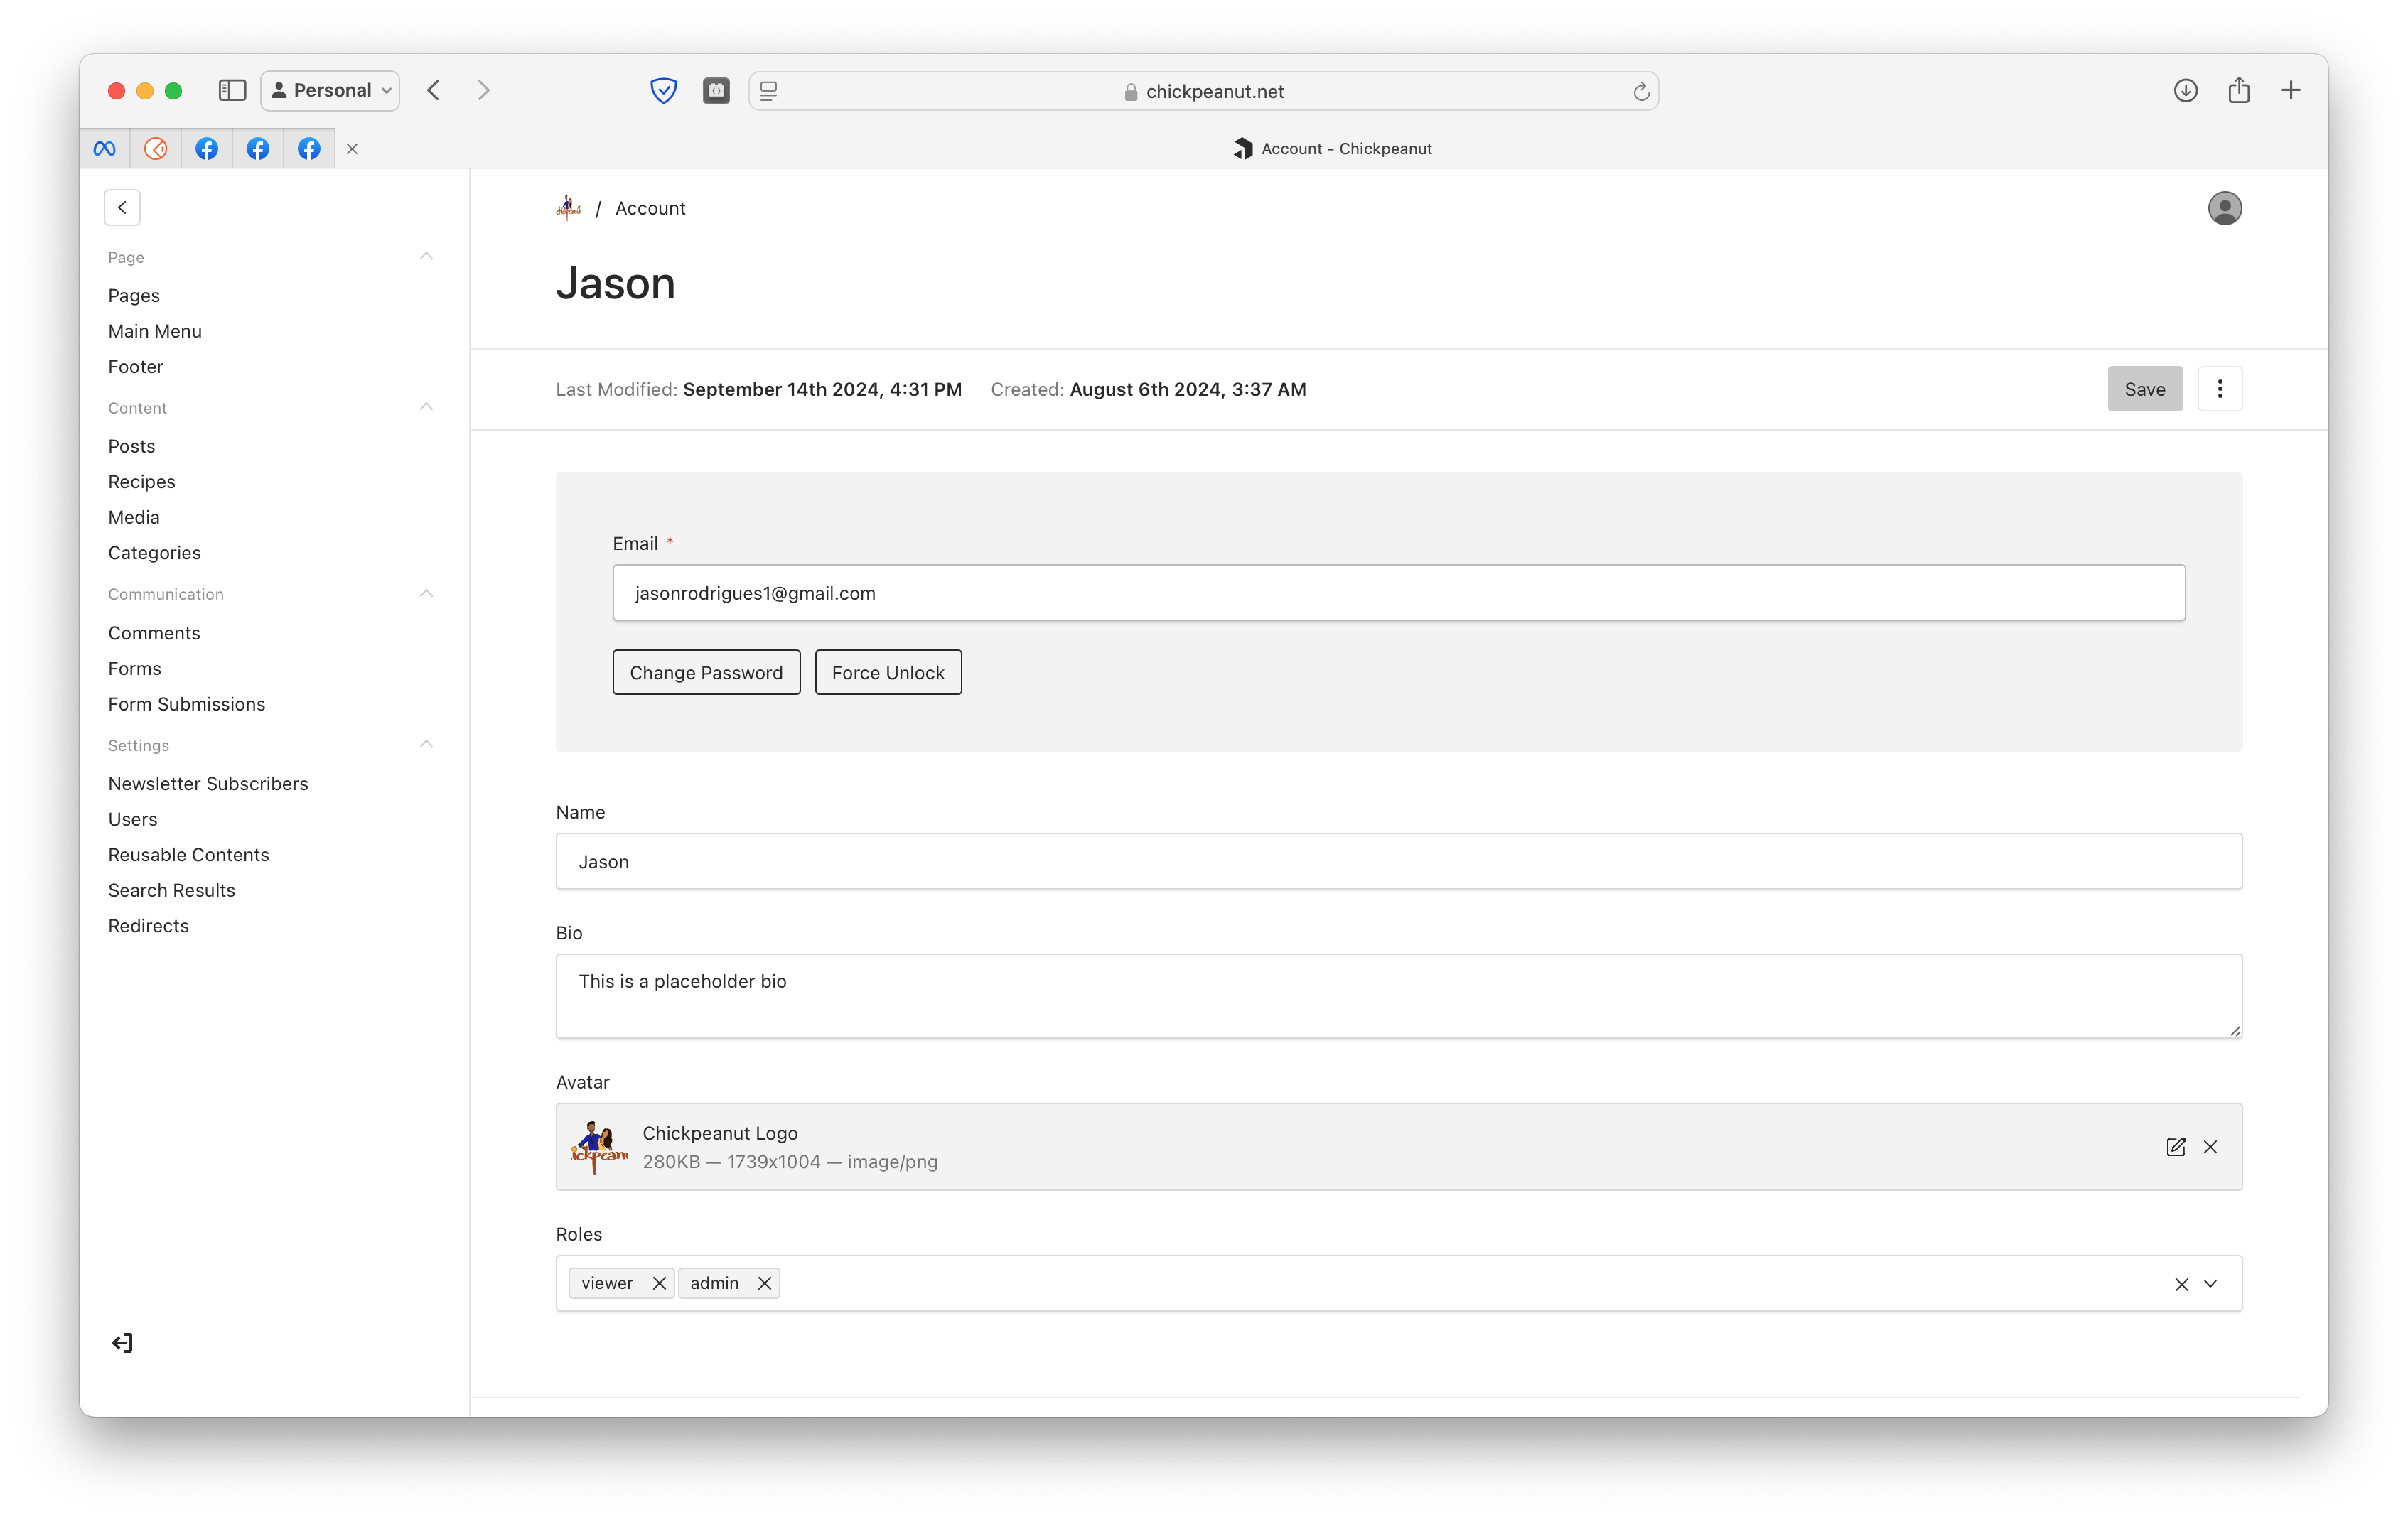
1. Setting Up Your Account
Create Your Profile
- Enter Your Name: Go to Profile Settings and enter your display name.
- Set Your Bio: Write a brief introduction about yourself.
- Upload an Avatar: Click on the avatar icon to upload a profile picture.
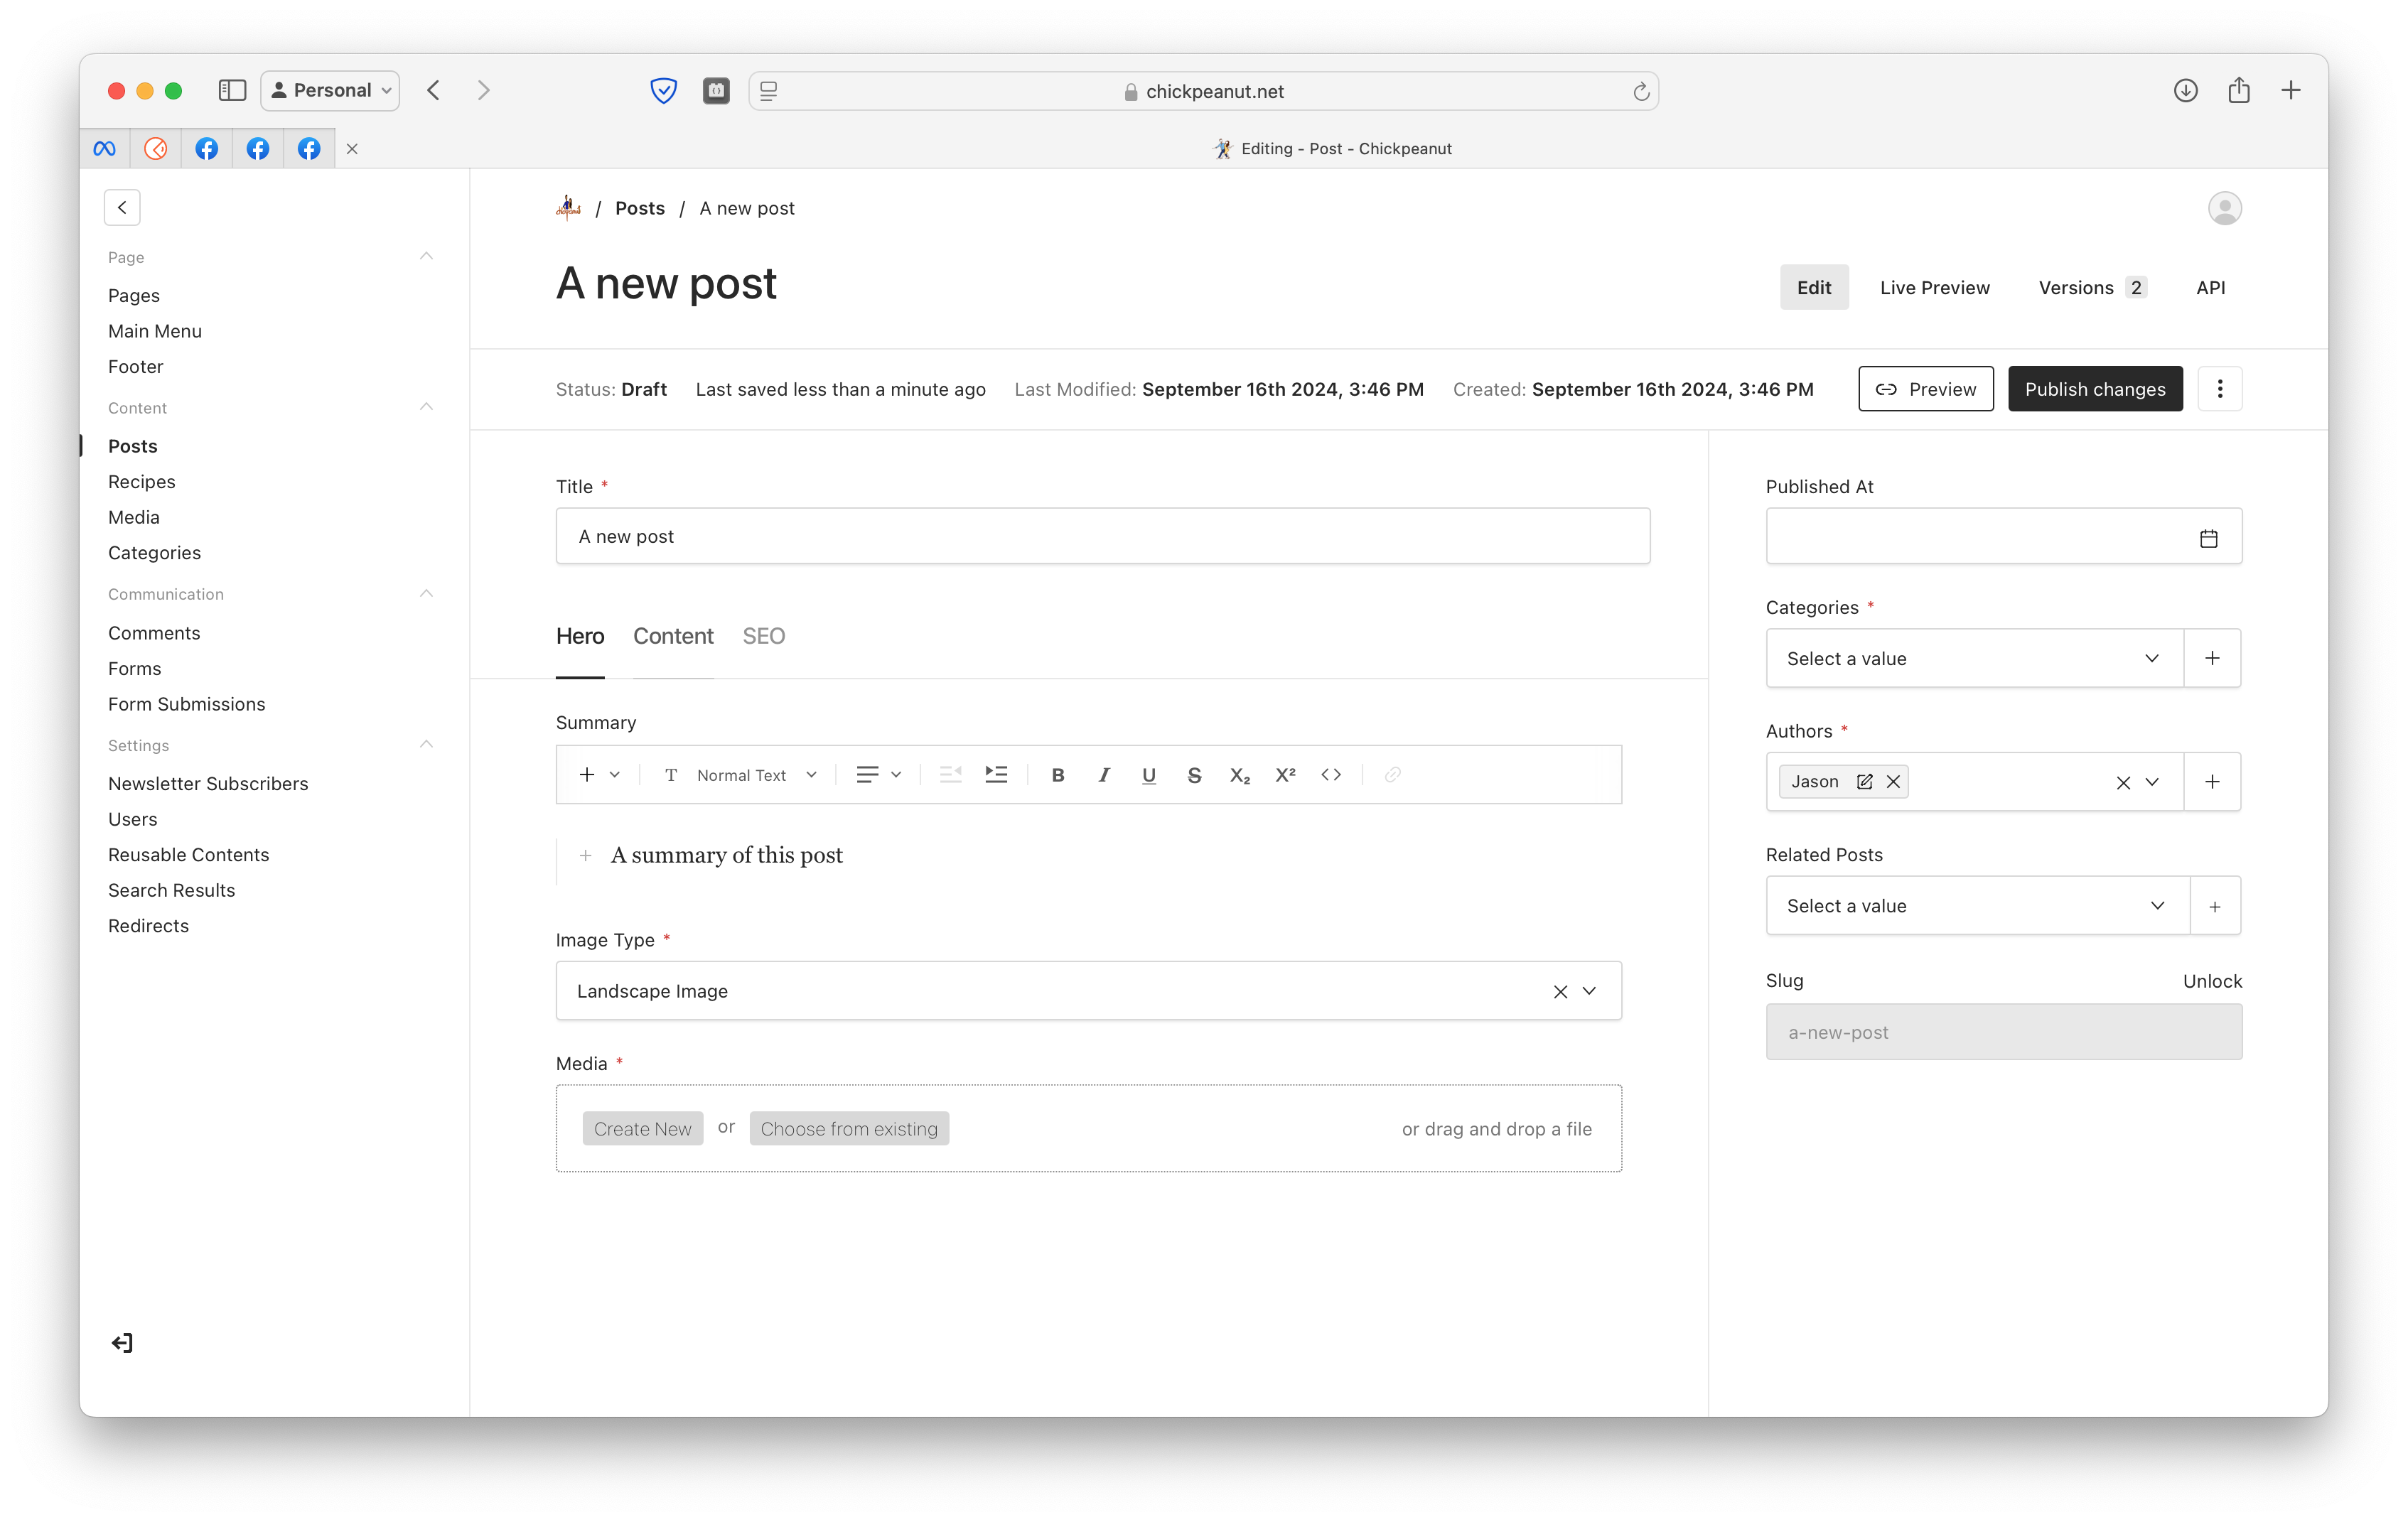
2. Creating Your First Post
Step 1: Select the Hero Section
- Choose a captivating Hero Image.
- Write a compelling Summary to introduce your post.
Step 2: Enter Your Content
- Use the Lexical Editor to write your content.
- Type
/to add blocks like MediaContent, MediaBlock, or CTA.
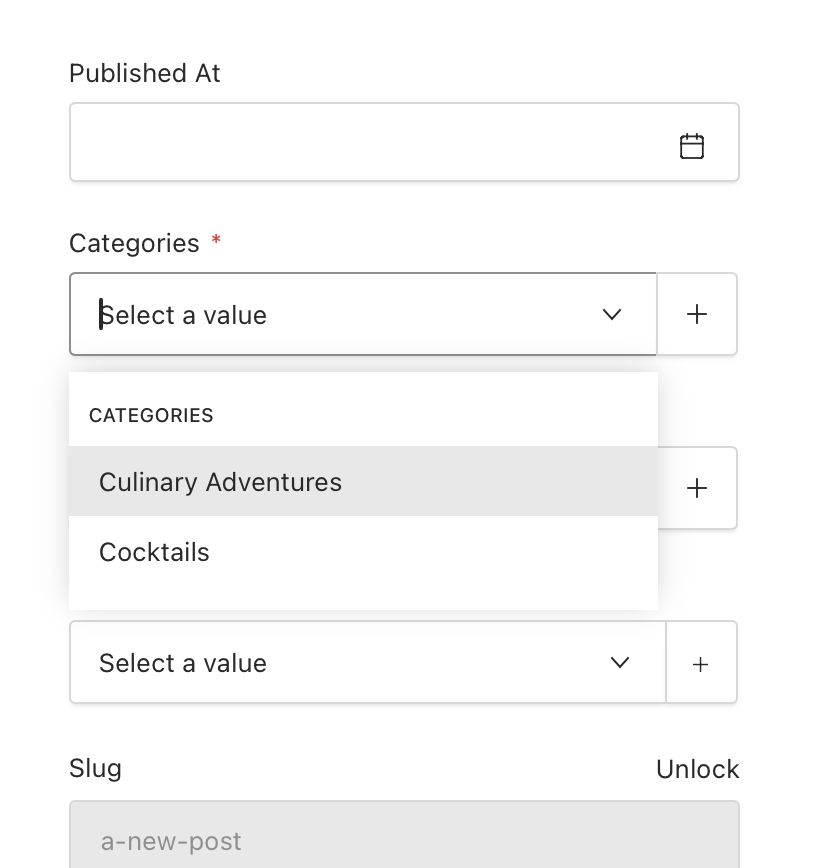
Step 3: Select a Category
- Assign your post to a relevant category to help readers find it.
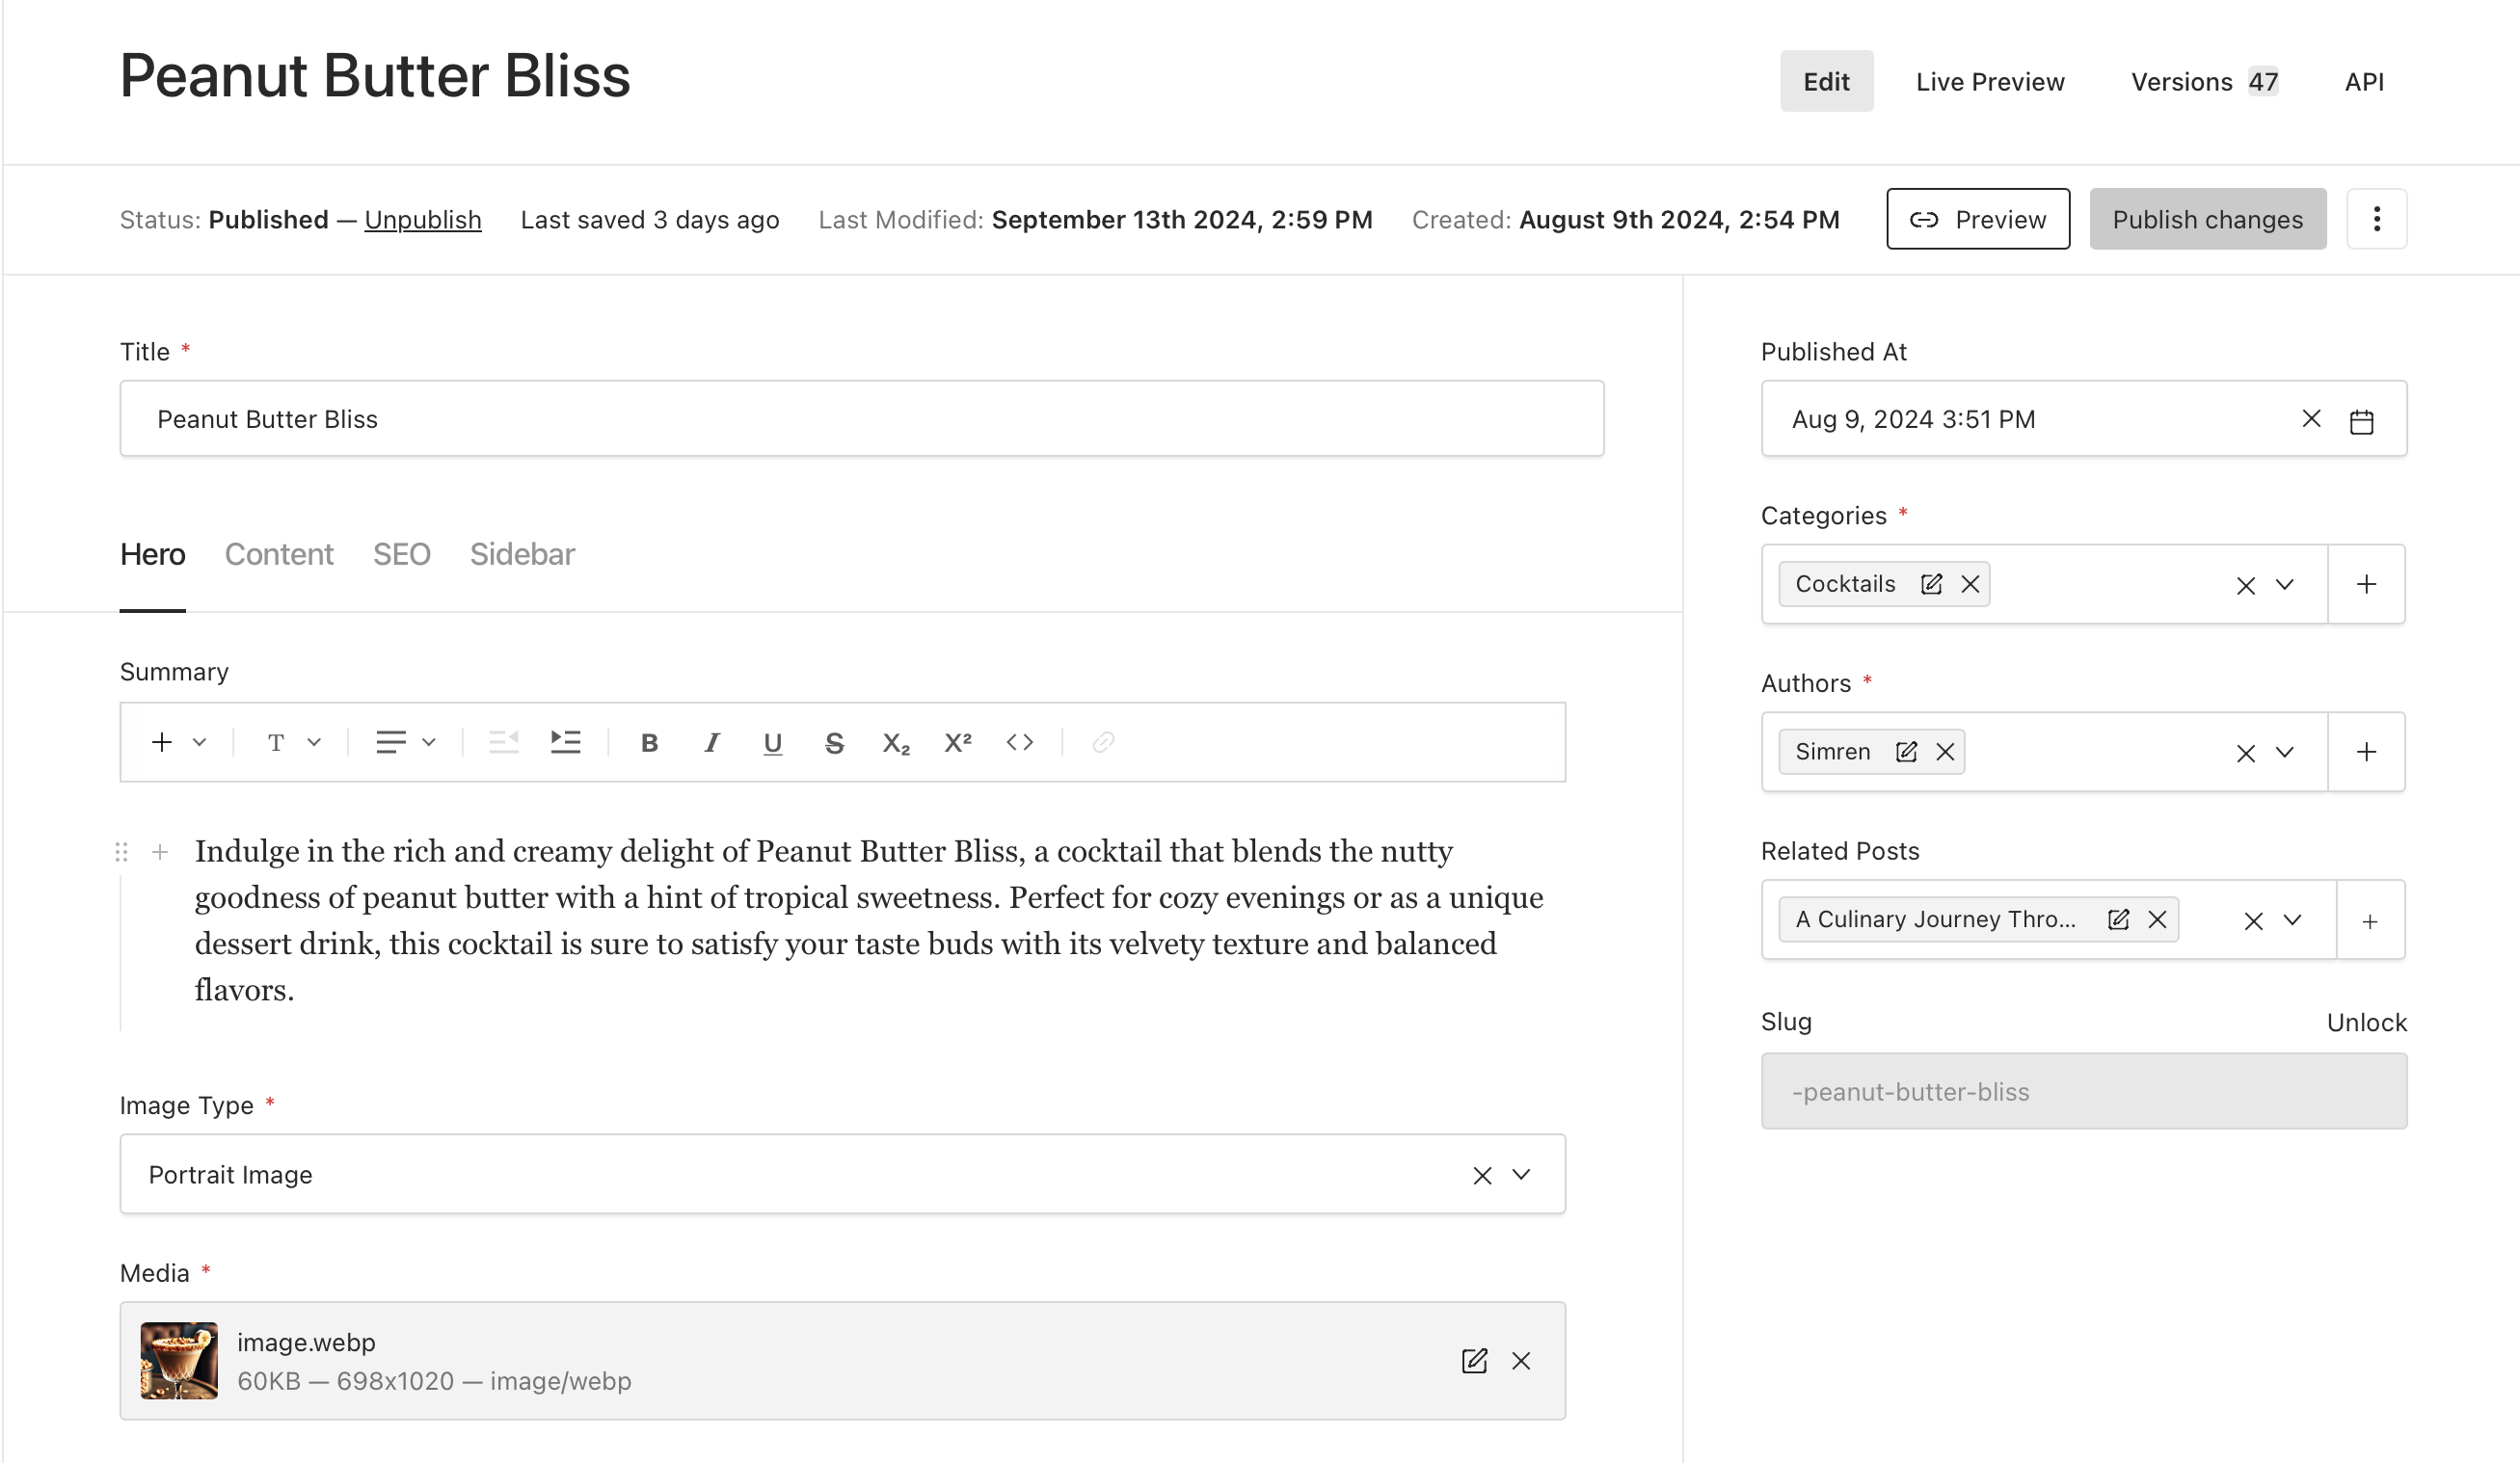
3. Creating a Recipe
Step 1: Set Up the Hero Section
- Similar to creating a post, select an engaging Hero Image and write a Summary.
Step 2: Add Ingredients and Preparation Time
- Ingredients: List each ingredient with its quantity.
- Preparation Time: Enter the time to prepare the dish in minutes.
Step 3: Write Instructions
- Use the Lexical Editor to provide step-by-step instructions.
- Include images, blocks, and even a Slider for visual steps.
Step 4: Customize the Sidebar (Optional)
- Add blocks like Posts Archive, Newsletter Sign Up, or Ads to the sidebar.
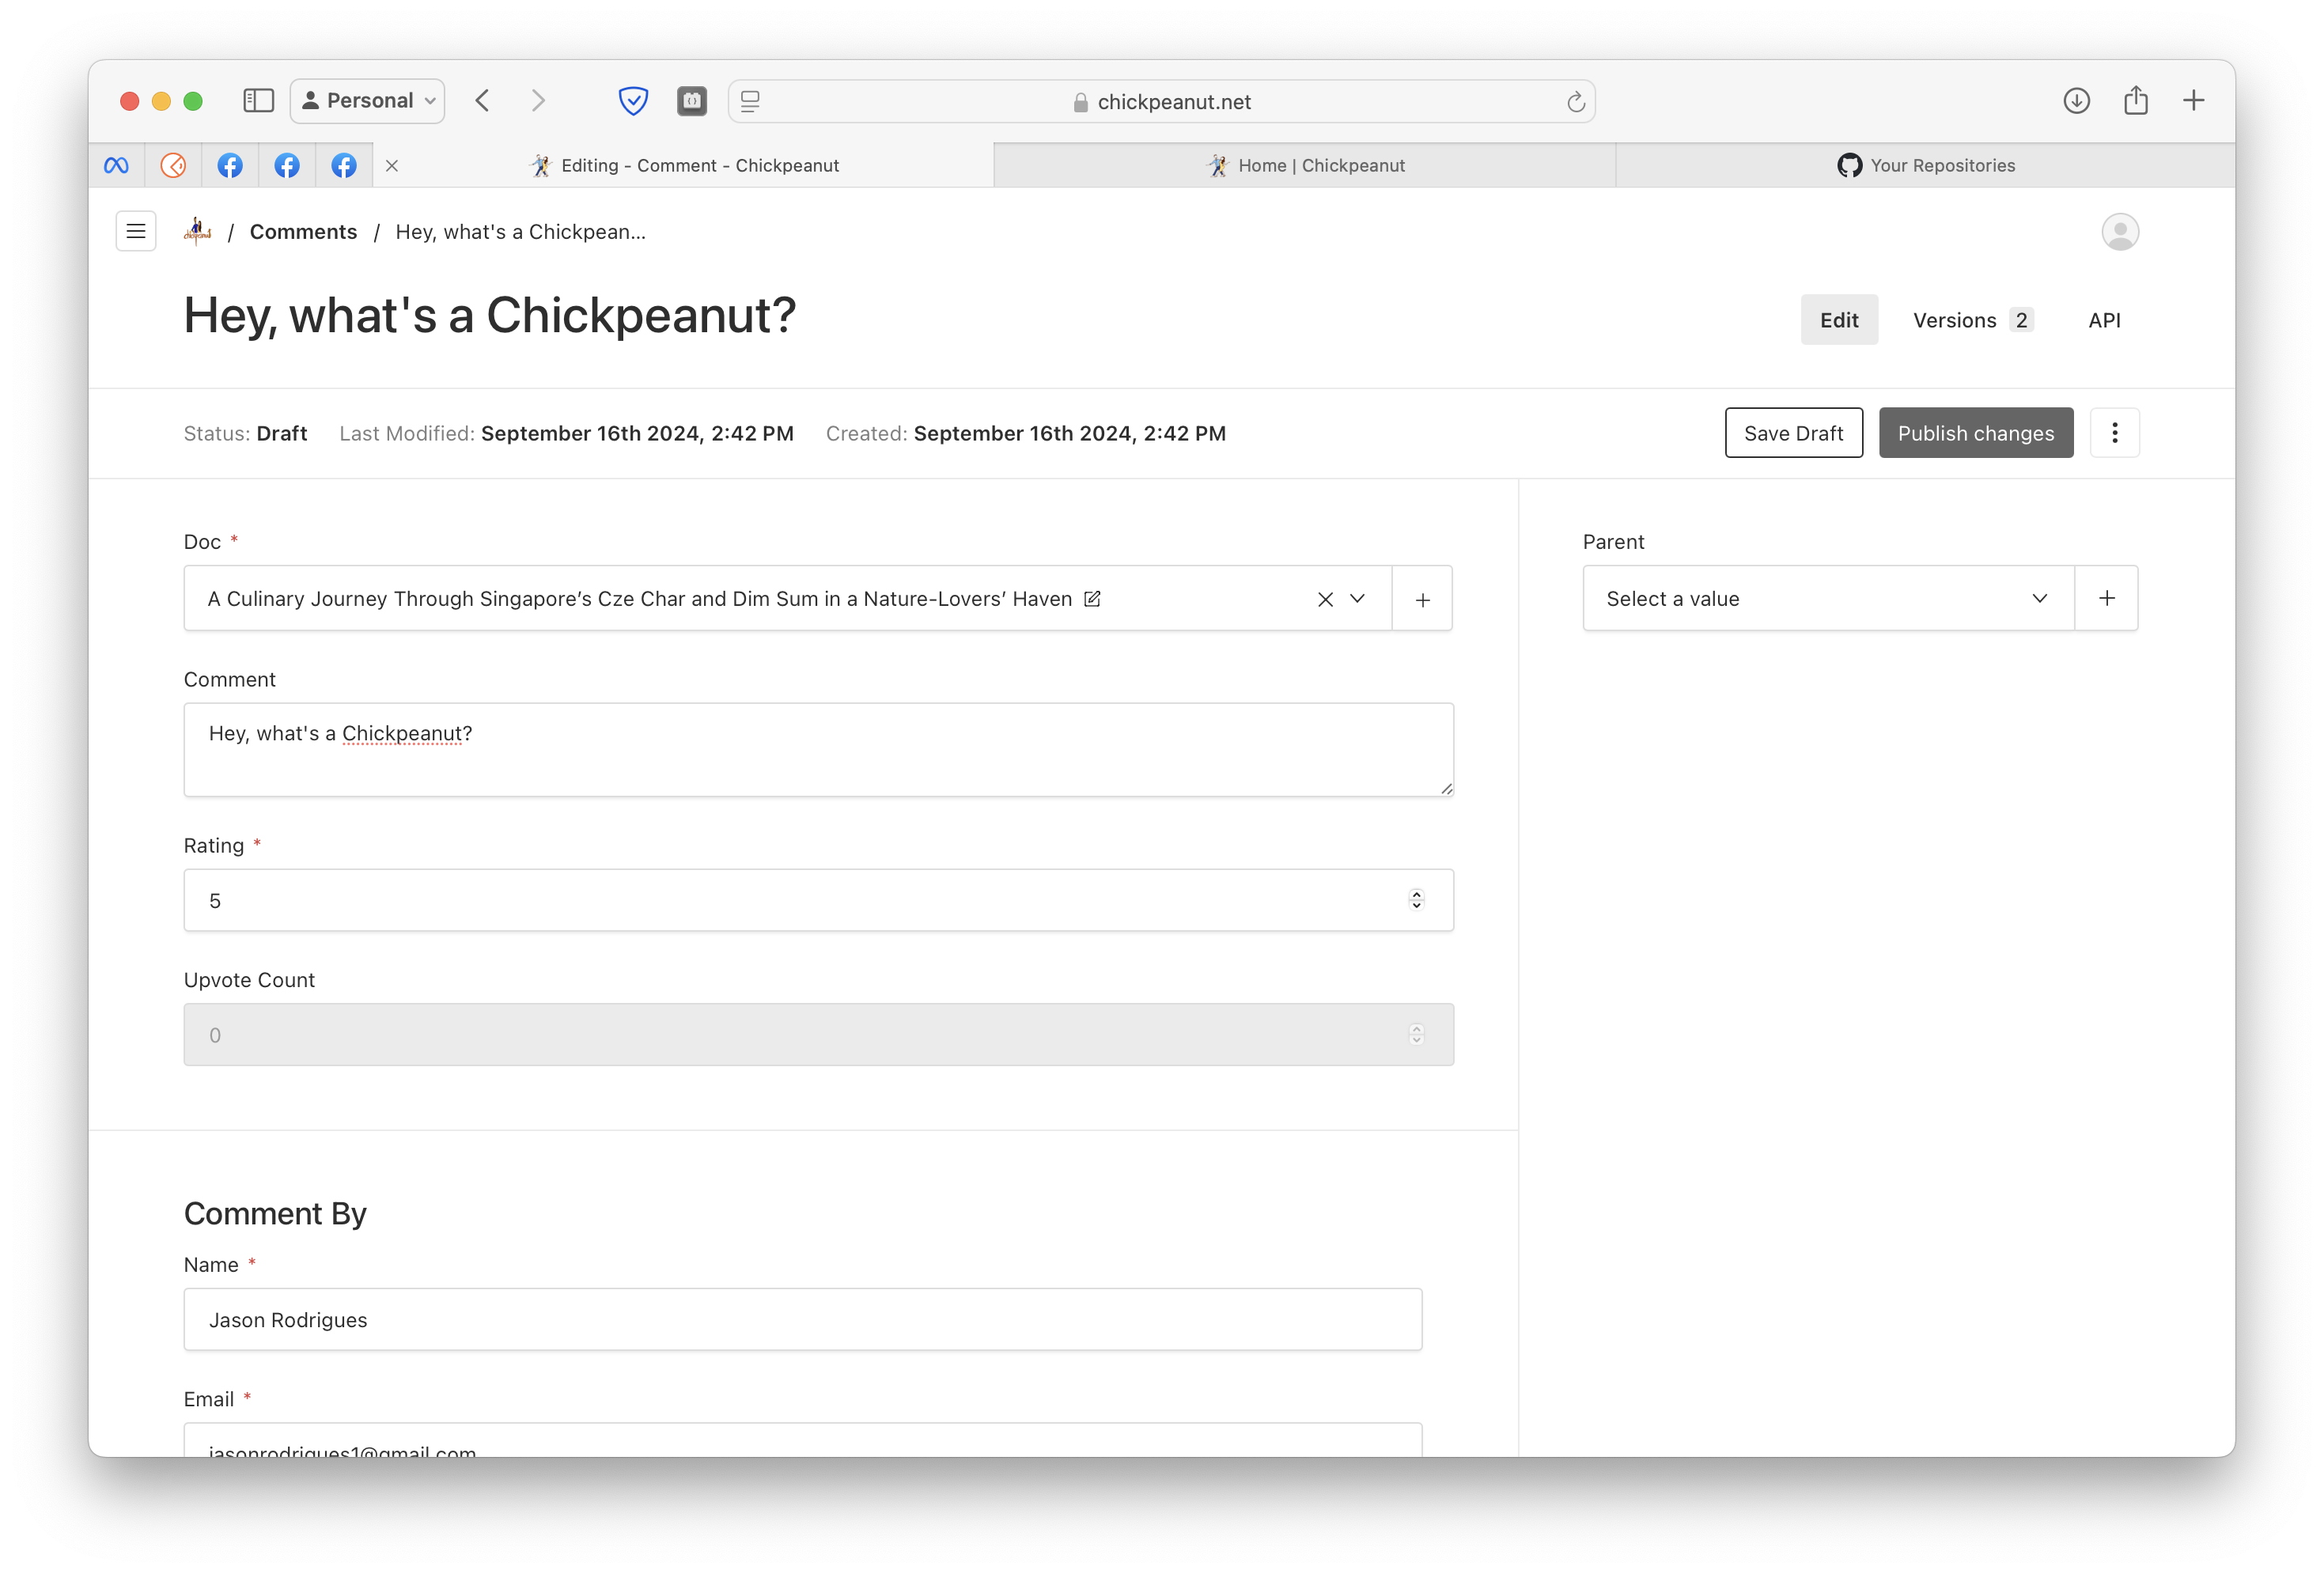
4. Managing Comments
-
Approving Comments:
- Go to the Comments section in your dashboard.
- Review new comments and click Publish Changes to approve them.
-
Deleting Comments:
- Click on the three dots (⋮) next to the comment.
- Select Delete to remove the comment.
-
Email Notifications:
- You'll receive an email when someone leaves a comment.
- Ensure your email address is up-to-date in Profile Settings.
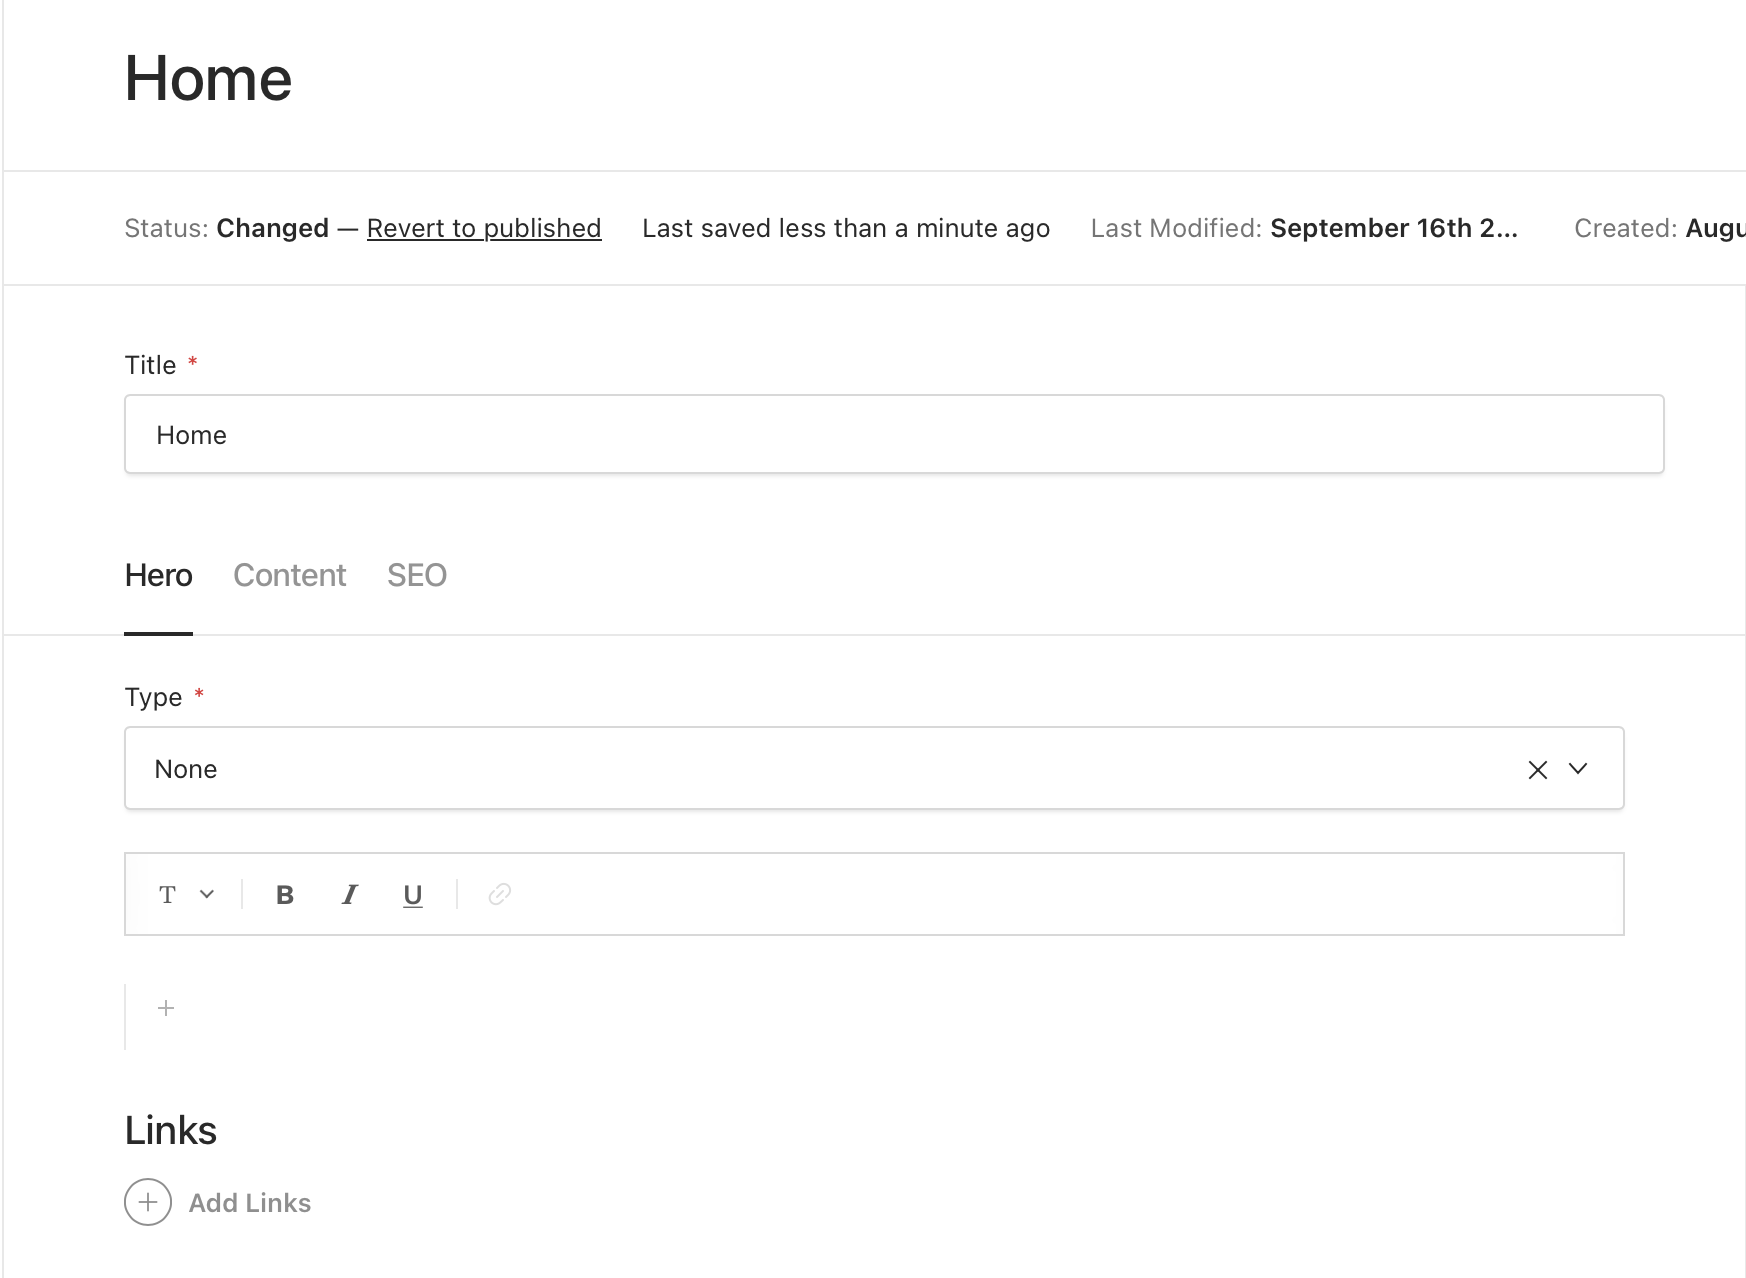
5. Creating Pages
Step 1: Set Up the Hero Section
- Choose a Hero Type:
- High Impact, Medium Impact, Low Impact, or None.
- Add headings, descriptions, and images as needed.
Step 2: Build the Content
- Use the Layout to add blocks and build your page.
- Available blocks include Call To Action, Newsletter Sign Up, Content, Media Content, Media Block, Archive, Featured Posts, Form Block, Reusable Content Block, Slider, Tabs, and Iframe.
Step 3: Configure SEO Settings
- Fill in the SEO Title, Description, and Image to optimize your page for search engines.
Nesting Pages
- You can nest pages under a Parent Page to create a hierarchy.
6. Using Blocks to Enhance Your Pages
Build dynamic and engaging pages using a variety of blocks. Here are some commonly used blocks:
Call To Action (CTA)

Call To Action block prompting users to take action.
Learn More About Call To Action
Newsletter Sign Up
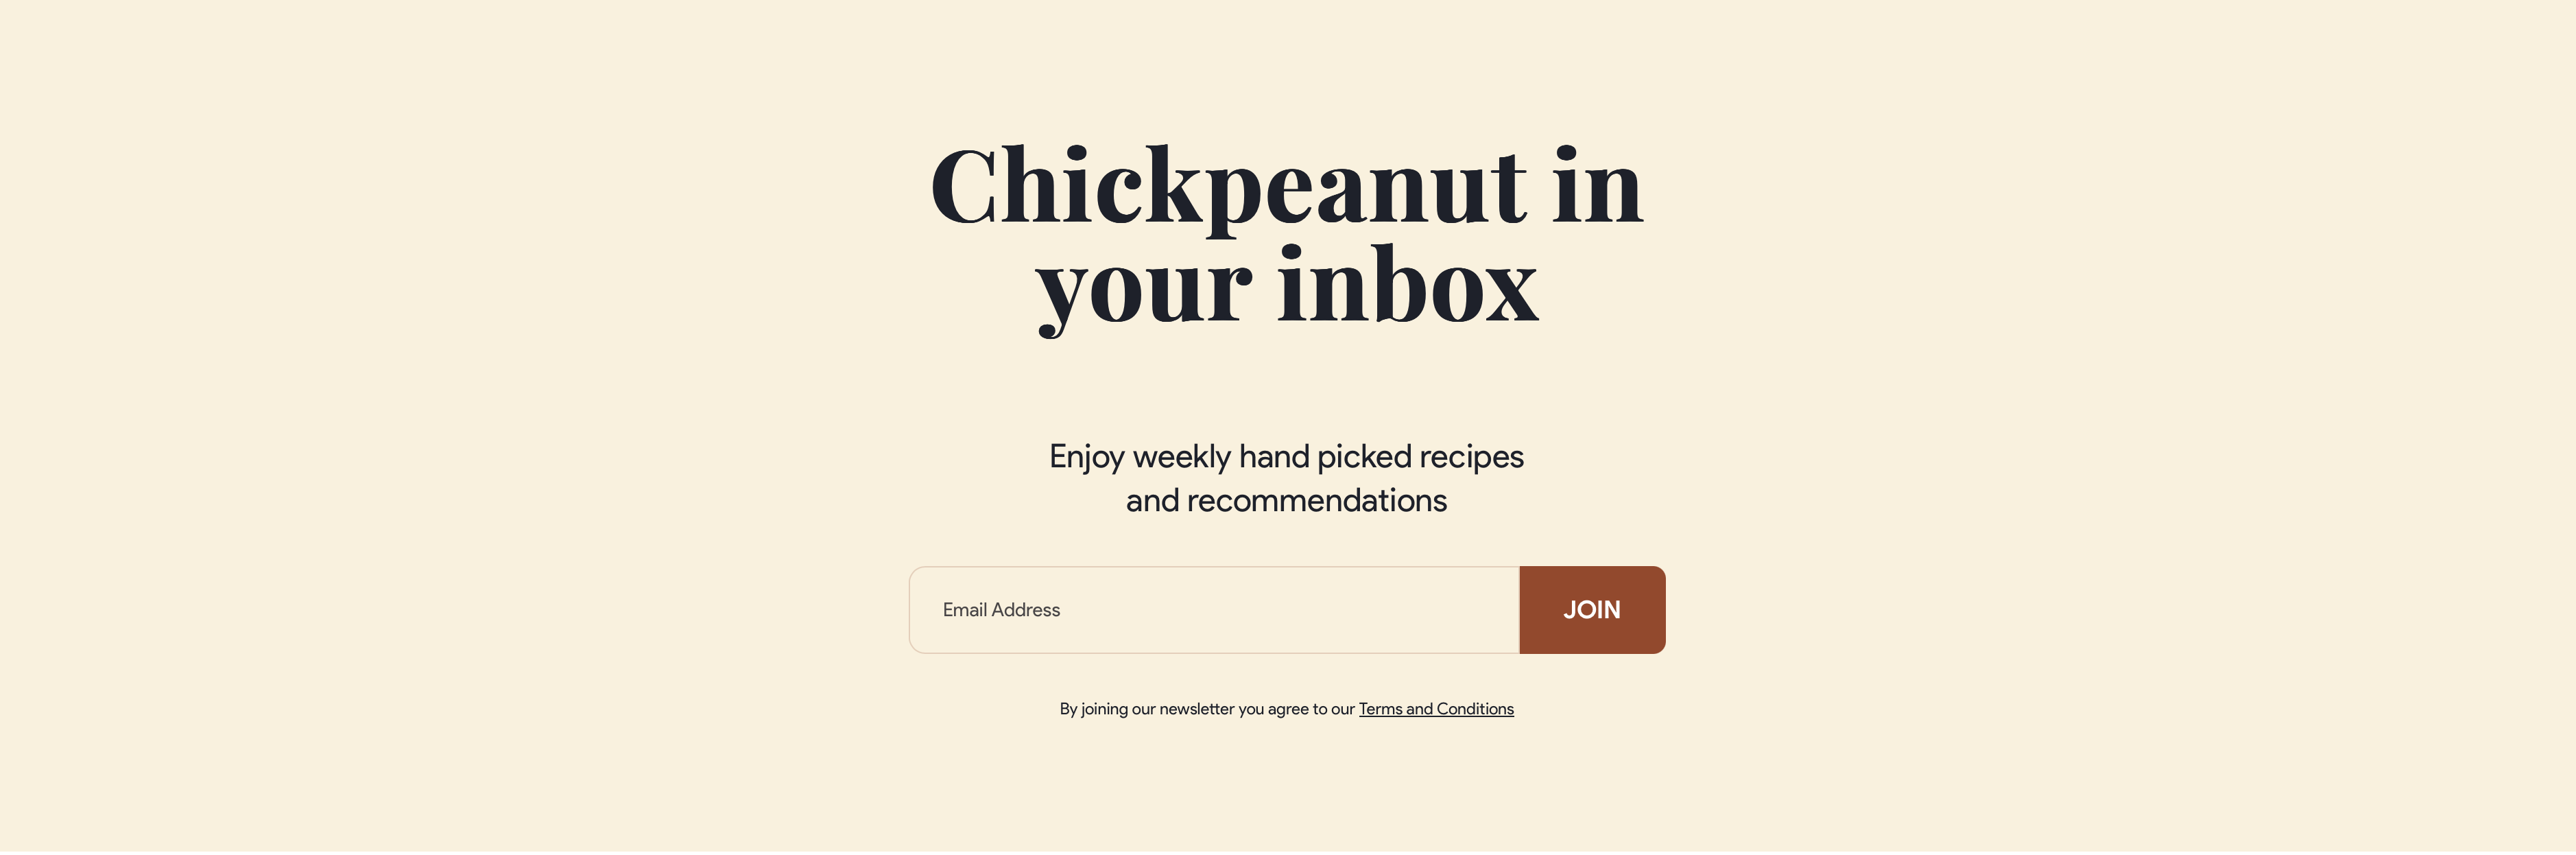
Newsletter Sign Up block to collect visitor emails.
Learn More About Newsletter Sign Up
Content Block
Content block displaying text and images in columns.
Learn More About Content Block
Media Content
Media Content block combining text and images.
Learn More About Media Content
Archive
Archive block displaying posts with category tabs.
Learn More About Archive Block
Slider
Slider block showcasing images in a carousel.
For more blocks and detailed instructions, visit the Blocks Guide.
Additional Resources
- Help Center: FAQs and support resources.
- Contact Support: Get in touch with our support team.
We hope this quick start guide helps you begin your journey on our blogging platform. Happy creating!